Netgear ReadyCLOUD for routers enables you to access files on a USB storage device connected to your WiFi router from anywhere. Once you create a ReadyCLOUD account and register your router, you are free to access the files remotely over the internet on your computer or mobile device. Not only this but you can also download, upload and share files with your friends.
Apart from the Netgear Nighthawk routers, one can even use the ReadyCLOUD service to find and set up ReadyNAS storage systems on the network. This useful tutorial will help you know everything about Netgear ReadyCLOUD setup for routers. Let’s delve in.
Does My Netgear Router Support Netgear ReadyCLOUD?
First of all, check whether your Netgear router has ReadySHARE port or not. Through the ReadySHARE port, you can connect a regular USB storage device to the router and make it available over the internet.
However, all routers with Netgear ReadySHARE port don’t work with ReadyCLOUD Netgear service. So check out the list below and get to know whether your router supports this amazing online Netgear storage service or not.
- AX8
- R6700
- Tri-Band AX12
- AX12
- R7000P
- R6400
- R7900
- R9000
- R6900
- R7800
- R7000
- R7300 DST
- R8000
- R8500
- R8300
- R8000P
- D8500
- D7800
- D7000
And a few other Netgear WiFi routers.
How to Setup ReadyCLOUD Storage on Netgear Nighthawk Wireless Routers
Now, we will discuss the Netgear ReadyCLOUD setup for your router. Here, we have put together the complete setup steps for you. Ensure to follow the instructions carefully to keep the setup issues at bay.
Step 1: Create a ReadyCLOUD Account
The first step to get Netgear ReadyCLOUD security is creating an account. Just go through the steps mentioned below to create a ReadyCLOUD account.
- Open an internet browser on your computer or laptop.
- Be sure to have an accessible internet connection on your device.
- Make a visit to http://readycloud.netgear.com web address.
- Now, you will see the ReadyCLOUD welcome page.
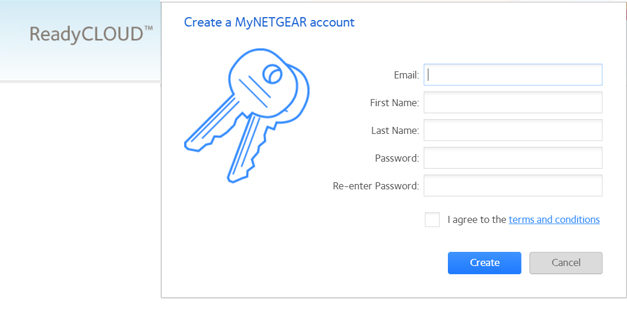
- Click on the Create Account link.
- After that, fill in all the required details like username, first name, last name, and password to set up your ReadyCLOUD Netgear account.
Congrats! Your ReadyCLOUD account has been set up. You can also use the ReadyCLOUD backup feature to back up your important data from your device. In case you still find any difficulty while creating your account, feel free to contact our experts.
Note: You can also perform ReadyCLOUD download on your desktop.
Step 2: Set up and Register Your Router for ReadyCLOUD
So you have created a Netgear ReadyCLOUD account successfully. The next step is to set up and register your Netgear WiFi router. Here are the steps to get the job done:
- Turn on your Netgear router properly.
- Connect a USB storage device to the router.
- Now, open a web browser on your computer or any other WiFi-compatible device.
- Navigate to routerlogin.net web page.
- Input the user ID and password to log in to your router.
- Once done, the basic home page will show.
- Select the ReadyCLOUD radio button to get access to your ReadySHARE storage device from anywhere.
- Next, fill in the ReadyCLOUD login credentials and click on the Register button.
- After registration, log in to your account.
Now, the ReadyCLOUD page shows an icon for the registered Netgear router and USB storage device.
That’s it! Enjoy your data from any time and anywhere through this superb Netgear ReadyCLOUD service. You can even make use of the ReadyCLOUD app to establish a secure connection between your computer or mobile device and the router’s USB storage device. In case of any doubts and issues, reach out to our well-trained and knowledgeable technicians.