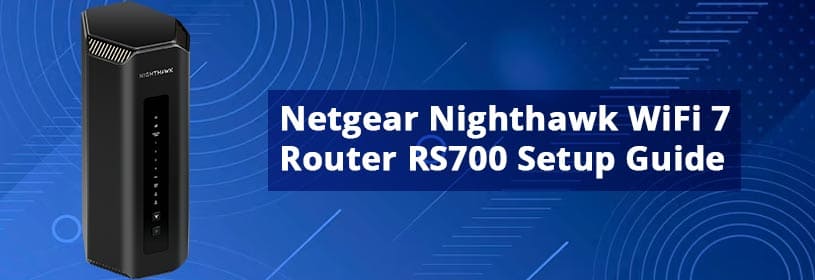
Netgear announced its first WiFi 7 router RS700 which will be available in the second quarter of 2023. This tri-band router with 2.4GHz, 5GHz, and 6GHz WiFi bands features a tower-esque design similar to that of some Orbi mesh devices. As per Netgear, RS700 can handle up to 200 concurrent clients. This router has 10Gbps ports and an in-built mesh feature that was not available in the Nighthawk routers till date. It claims to blanket up to 3500 sq. ft. of place with high-speed and strong WiFi signals.
Nighthawk RS700 WiFi 7 Router Features
- Supports WiFi 7 standard which is 2.4 times faster than WiFi 6
- Fully backward compatible with previous generation WiFi devices
- Blazing fast WiFi speeds up to 19 Gbps
- Lower latency rates
- 4K/8K streaming
- Powered by Broadcom’s BCM6726/3 WiFi 7 chips
- Sleek and slender design
- High-performance antennas
- Covers up to 3500 sq. ft. area
- 360 degree WiFi coverage
- 10 Gbps internet ports for the fastest download speeds
- Netgear Armor provides real time protection against hackers
How to Set Up Nighthawk RS700 WiFi 7 Router?
Once this WiFi 7 router RS700 is available, you can purchase it and install it in your home to reap the benefits of all these features. But, how to install it in the home? If this question comes across your mind, then we can help you with this. Know that you can set RS700 router via the Nighthawk app by Netgear. This app can be installed on both Android as well as iOS devices. The steps involved in the setup process are as follows:
Step 1: Place the Router
First and foremost, find a suitable place for your Nighthawk RS700 router which should be a neat and dry place near the modem. Unbox the router and place it. Find an available active power socket here and plug in the power adapter. Turn the power button on now. The lights on the router should become solid after flickering for some time. This is when you go for the next step.
Step 2: Connect Router to Modem
To proceed further to complete the setup process, fetch an Ethernet cable and make a solid connection between the RS700 WiFi 7 router and the modem. Make sure the cable is inserted properly in both devices. Turn on the modem as well.
Step 3: Download the Nighthawk App
Now, download the Nighthawk app on your smart phone. For this, grab hold of your smartphone and unlock it. Thereafter head toward the app store as per the operating system of the phone. Use Google Play Store or Apple App Store and in the search bar type Nighthawk app. Tap on the correct search result and begin installing the app on your mobile.
Step 4: Log In
To move further, you need to tap on the Netgear Nighthawk app icon and launch it. Once the app opens up, do the routerlogin using the admin credentials. If you never had Netgear account previously, then make an account right now and log in using the login details.
Step 5: Follow the Instructions
As soon as you are logged in to the admin portal on the Nighthawk app, you will be prompted with some setup instructions. Keep following them in order to get though the setup task that you ought to do. There you go! This way you can set up or install the Nighthawk RS700 WiFi 7 router in your home. The same app can be used to manage the router settings.
Tips to Smoothly Complete the Setup Process
The setup process is very easy as you just read. But you might get stuck somewhere due to any reason. You can contact our expert team to get rid of the issue at hand if you face any. Or you can use the tips provided ahead to fix any problem.
- Use the updated version of the Nighthawk app to set up RS700 WiFi 7 router.
- Also, update the operating system of the phone that you use to set up the router.
- Log in using the correct admin password.
- Ensure to follow all the prompts correctly and do not miss any step in between.
- The Nighthawk router should be receiving a stable power supply.
- The internet connection should be reliable.
After you are done with setting up your Netgear Nighthawk RS700 WiFi 7 router, you can access its blazing-fast internet on various devices across your home.

